Friday, July 31, 2015

Be Silly!

Happy Friday, friends!  Have you seen the latest sketch over on the My Scraps Sketch Blog?  The awesomely talented Juliana Michaels is the Guest Designer this month, and her sketch is so much fun!


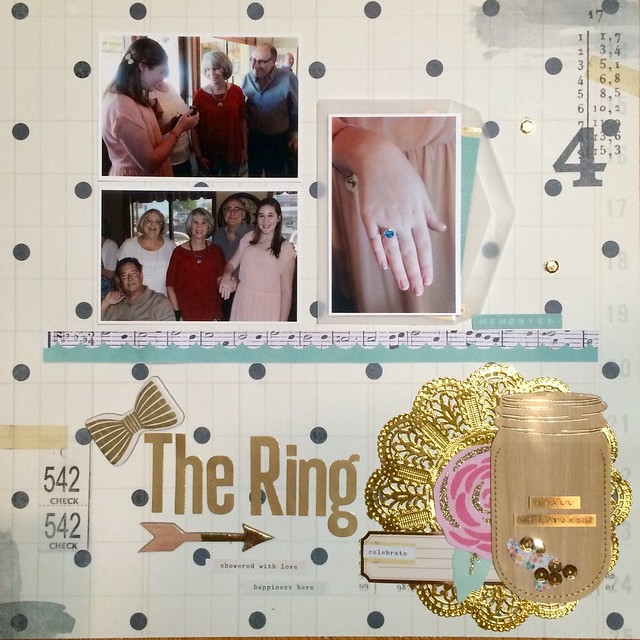
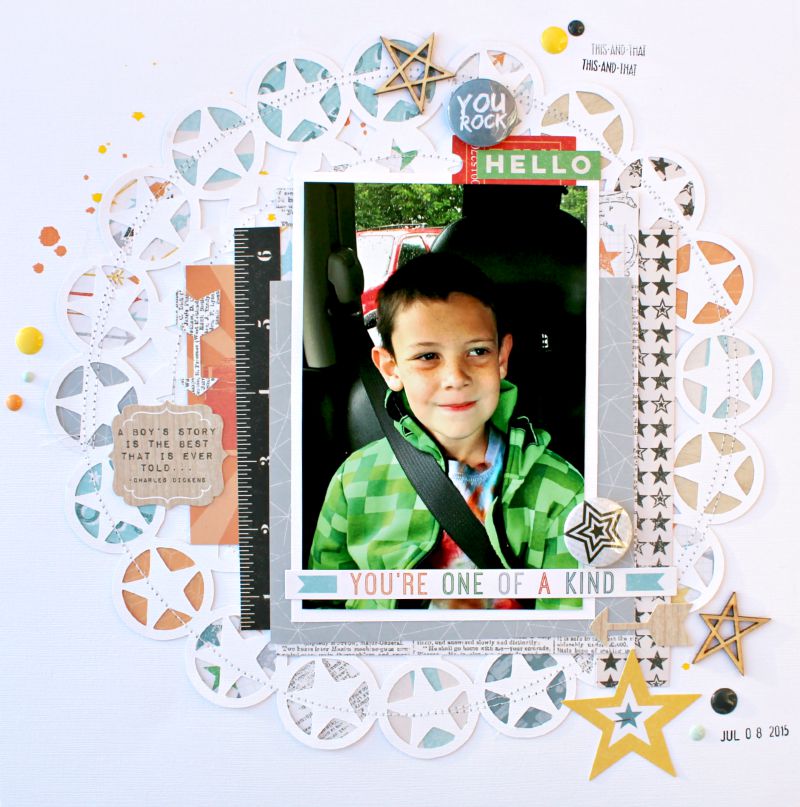
Here's what I came up with.  I pulled out the Amerian Crafts Dear Lizzy Fine & Dandy collection for this.  I decided to go mixed media for this one, so I started with some white gesso on top of the black dotted patterned paper.  I used watercolors and gelatos to create the color splotches on the background.  For the circles in the sketch, I traced some of different sizes and then used gelatos to shade in some yellow.  I was excited to use one of the transparency papers in the collection...I really love how it looks!


Here's a close-up of one of the circles.  Gelatos smooth on very nicely if gesso is down first.  I just colored it on like a crayon and then used my finger and a touch of water to smooth is around the circle.  You can also see the transparency here as well as some stitching I did.


Here's another angle of one of the circles.  I splattered some black Color shine at the end to bring in a little more pops of color.


Gold foil....hello!  I cut this from one of the specialty patterned papers and added a gold arrow paper clip.  Sometimes the best embellishments come straight from patterned paper!


Layers and more layers :)  I layered in patterned papers, tissue paper, stickers, chipboard and tangled thread.  I finished off my photos with a cute little yellow bow sticker.


One last close-up of the title....and it's shiny gold!  These Thickers are gorgeous!  I layered them right on top of the transparency and added a die cut under it.


Be sure to visit the My Scraps Sketch Blog every Friday for a new sketch! And be sure to check out the STORE...there are SO many things coming in!!

Thanks for stopping by, and have a great day!

Missy :)

Thursday, July 30, 2015

The Ring


Hi there, Lisa S here today to share a layout I created for our Tuesday Trigger Challenge over in the FORUM.   One of our triggers this month is celebrations so I'm sharing this page I made about my daughter's Bat Mitzvah ring.  It's a family tradition that each child gets a ring for their Bar or Bat Mitzvah from their Great Aunts and Uncles, so I had to mark this milestone with a layout. I used Crate Paper Journey Collection mashed up with some Confetti for this layout. I LOVE these  sticker letters!!
Your challenge for this trigger is to use alphabet stickers and GOLD on your layout!!  Hope to see you sharing some of your celebrations, too!


The ring

Wednesday, July 29, 2015

Happy Hump Day!

Hello!
Lisa here today to share a layout with you. I am sharing the layout I created for my Tuesday Trigger challenge over on the forum at MS&M.
Our themes this month are: July Celebrations, red, white & blue, stars or patriotic. I chose stars for my layout and used Amy Tangerine Plus One along with a star cut file.

 
I used an orange Gelato and colored the cut file and then added a little water with my finger:

 
I used an Amy tangerine frame to frame one of my photos. The "My" stickers are from my stash as well as the baseball, which I tucked some thread behind.

 
I used some Thickers for my title and the arrows are fussy cut from one of the Amy Tangerine papers. I finished the layout off with some Heidi Swapp Color Shine Mist spatters.
 
Have a wonderful day!
Lisa

Tuesday, July 28, 2015

Pumpkin Coloring.

Hello and good morning...

Happy Tuesday!!!

I'm sharing a very non holiday themed layout with you with some halloween photos of my lil one, while she was pumpkin decorating. I used the Cocoa Vanilla Hello Lovely collection for this layout.
I went with very nontrational colors- using pinks and aquas, which is also probably one of my fave color combos. But there is a bit of orange through the page also.


I actually used a Sharpie pen and colored in some of the spaces in the patterned paper on the top black and white paper. Then added lots of fun wood pieces and enamels on the page:


I also popped in a bit of random twine and added some to the tags:


But with tons of new holiday collections coming out, there will be a ton of holiday papers and embellies to choose from. I just like to mix it up and scrap non themey holidays pages too sometimes..

Thanks sooo much for stopping by and have a great day!!!!

Monday, July 27, 2015

I Scream, you scream....

There's nothing better in summer than having a yummy cold ice cream on a hot day....except for the fact that it melts SUPER fast!

I used the new Crate Paper Poolside collection for this page.   I added my strips of papers, washi tape, and card stock diagonally, and added some vellum behind my photos to help ground them a bit. 


I added a few embellie clusters....


and a few more gold bits to balance the page.....


*************Store News*************

I have reordered some embellies from Crate Paper Wonder collection, and there are a LOT of new goodies and collection coming in mid to late August, including Cedar Lane from Pink Paislee, new lines from Simple Stories, and lots more!!!

Be sure to use code REDWHITEBLUE20 to save 20% off for the rest of June!


***********Got Talent Contest********


Our Got Talent contest is just about half way over!  But there is still plenty of time to join in!  You can check out our challenge on Facebook OR on our forum:

Facebook Challenge Group: https://www.facebook.com/groups/369944409861404/

Forums:   http://myscrapsandmore.proboards.com/


Stay Scrappy My Friends!


Sunday, July 26, 2015

Hello Mr.Seal with old school/new school October Afternoon

To me summer screams outdoor fun and water tones and yellows! I wanted to create a layout with lots of water tones and a hint of sunshine yellow.
I created this layout for this weeks Throwback Thursday on the forum, mixing older product with newer product for a fun, harmonious look!
To really make my papers pop, I started by converting my photos to black and white. This helps to not need to work with the colors in the photo and use correct papers to tell my story!
I started with mating my page in basic cardstock to help add more focus to my patterned paper. I than used the Shipwrecked Coast paper found in the new Treasure Map collection to create folded squares for a fun base! I than used the older, Reference Section paper from the Public Library collection to pop out floating circles. I love how it softens the shipwrecked paper and mixes so well together!
I added some more circles with some vellum paper from Crate Paper. For just the right detail, I used some Public Library border stickers to my photos and page borders.
Using some Public Library mini market alpha stickers to complete my journaling, I completed my happy, well mixed page!! I hope this inspires you to play with your collections, mixing them up together!
 Brianna

Saturday, July 25, 2015

You're One Of A Kind

Hello everyone! It's Jennifer and I'm here with a layout I created using 
Cocoa Vanilla's Made of Awesome collection!  If you are looking for a fun boy-themed line, this one hits the target!  The colors are bright without being overbearing! I used a cut file from The Cut Shoppe for my background and added circles of patterned papers behind random spaces. 


The Accessory Stickers have a wide variety of shapes and sayings such as this fun sentiment!  

I really love the cute Flair Buttons such as this "You Rock" piece.  You can also spy more of the coordinating stickers as well as Enamel Dots!


I accented my pages by adding more flair, stickers, and enamel dots! I also added a couple wood veneer stars from my stash!  


Thanks for reading today! Check out the My Scraps and More Shop for this collection plus much more! Have a great day!


Friday, July 24, 2015

Got Talent Challenge #8 - Recycling & Handmade

Happy Friday, friends!  Missy back with you today.  Today marks our 8th Got Talent Challenge!  It's up on our forums and our Facebook group.  I hope you will join in with us!

The challenge this week has two parts.  The first part is to use some plastic packaging from some of your scrapbook supplies and use it somehow to create an embellishment.  I created a see-through shaker pocket full of chunky glitter.  The packaging contained a set of brads.  I cut both ends off and machine stitched through one end.  I poured some glitter inside and then stitched the other end closed. It was really fun to make!  I have never done this before, so it was neat to give a whirl.

The second part of the challenge is to draw or paint at least one word of your title.  I used watercolors and a paint brush to paint the word "LOVE" onto white cardstock.  Then I cut it out and combined with alpha stickers.

I used the gorgeous Simple Stories So Fancy collection, and let me tell you....it's stunning!  I love the colors...just beautiful.  Get yourself some of it HERE.


I jazzed up the background a bit with a few blue shades of Distress Ink and a Crafter's Workshop stencil.  I also added in a few splatters with my brush and some splatters of gold Color Shine.


I found a sketch circle die cut in the Silhouette Store and used as a layering piece behind my photo along with a few patterned papers and some tissue paper.  I also added in some tangled thread, a few heart die cuts, a brad an some enamel dots.


Check out this shaker pocket!  I love it....it turned out so much better than I thought it would!  I added in blue, purple and gold chunky glitter I found at Michael's.  I also fell in love with that gorgeous dream catcher die cut from the collection.


And here's a shot of the hand-painted title.  I love how it turned out, too!  My small alphas are from the Basic Grey Prism sticker sheet.


Here's a look at how I put this all together if you'd like to take a look.....hope you enjoy!


Thanks so much for stopping by, and have a wonderful weekend!

Missy :)

Thursday, July 23, 2015

So Bittersweet

Hi there, Lisa here today to share a bittersweet moment.  Sometimes, in an effort to be genuine as we tell our lives stories, we have to share the not so happy moments.  For the most part, our scrapbooks are filled with the highlights of our lives...but there are moments worth remembering, especially when they are part of a bigger story, but explain so much.  In this layout I created for my middle daughter, I used a screenshot of her snapchat story to remember the big moment she realized that it would be the last time she was on this stage that she had performed on for 15 years of her life.


The Maggie Holmes Confetti Collection is filled with little tickets of all kinds and I fussy cut them and some film strips to build this layout.  The flowers, which reminded me of the flowers we have given her after every perfomance were cut from an older piece of Crate paper as well.  I tucked a journaling card with her story (also from that same piece of paper from the Confetti collection) into a glassine bag behind the photo as this was a very emotional moment for her and I didn't feel the journaling belonged front and center.  I hope you'll take the time to scrap the bittersweet moments, too.  It helps not only to process the emotions surrounding those events but keeps our stories real.  


Wednesday, July 22, 2015

Cheeseheads!

Hey there Scrappy Friends!
I have to admit: I'm from Wisconsin and my family are die hard Packer fans! There is a story behind this cheese head hat my DH is wearing in the photo, but I will save that for my blog.

Any who, I used My Scraps & More Sketch #110 along with Basic Grey Prism. Let me tell you, it has been many years since I bought Basic Grey. I used to love it and then not so much. But this line has me sold once again on BG! Love it!

 
Besides the BG Prism, I used a variety of stickers for my words. I also used watercolors and mists on my background including Heidi Swapp Coral and Black Velvet for my spatters. I also used sketch #110 from the Sketch Blog.
Here are some close ups:
I cut the word "cheese" and some circles on my Cameo. The circles I added watercolor and used a marker for the stitching. I added some Thickers and Making Memories mini alphas to complete my title:
 
 
I also cut the thin pie charts and backed them with different patterned papers. I used Bella Blvd Enamel Doodads and some of the acetates from the Prism line:

 
Actually, I included the story behind this cheese head here in my journaling:


Thanks for stopping by and sharing your day with us!


Tuesday, July 21, 2015

Oh Cutie.

Hello and good morning...

Happy Tuesday...

Today I am sharing a layout with you from the latest Got Talent challenge contest going on, you can either play along in the forum or on the My Scraps & More facebook page. For this challenge, since we ALL have tons of patterned papers, I decided that it would be fun to make our own pattern paper. This is a great technique to help ensure that your papers match your photos or whatever you are trying to highlight.

I made this page, mainly using Cocoa Vanilla's Hello Lovely collection, but I added three of my own homemade patterned papers.


For my first paper, I made a script pattern, writing a sweet note of my little cutie. I punched a border on the side and added it under the pink graph paper:


Next I created an ombre misted paper, that matched exactly with her skirt in the photo:


Lastly I made a flower watercolor paper, using a stamped image:


Next I added some sharpie pen coloring inside the flowers:


To top it off, I added some watercoloring with pencils and used a blender pen to color the image in, giving it more of a "soft" feel. Again pulling colors from her dance outfit:


So get creative... what technique would you use to create your own patterned paper???

Thanks sooo much for stopping by and have a great day!!!

Monday, July 20, 2015

Hello Lovely GOODIES!

It is going to be a BUSY BUSY day in the store today!  Scroll down to see what's arriving!  

But first, let me share this page I made with the gorgeous Hello Lovely collection from Cocoa Vanilla Studios!


I started by making a little grid design with 3 patterned papers on the background, and added a black and white and scalloped strip across the middle.  I added a cluster of embellies on the bottom right of the papers, and my photo with a few fussy cut flowers to the left.  I scattered more of the fussy cut flowers around the page to make your eyes move.


I added more fussy cut words and an ampersand for my title.  A few ink splatters, and small strips of paper on the top and bottom of the page to frame it a bit better.  Finally, some stitching for texture.


****************STORE NEWS****************

FIVE new collections will be listed in the store TODAY!!


*****************HOLD YOUR ORDER***************

I have added an option to the checkout process where you can now HOLD your order. You may hold up to three times for one shipment.  On the 3rd order, choose your shipping method.   If your three order total over $75, you can again choose HOLD, however, leave a note to ship your order and it will be shipped with free shipping!!   The hold option may NOT be used with sales or special events.   Holds can not be held for more than 4 weeks.


Sunday, July 19, 2015

Pretty Upsetting, with Pink Paislee

I personally fell IN LOVE with the Pink Paislee Citrus Bliss Collection right away, but like many other paper crafters, my first thought was how to use this very specific paper full of pineapples and flamingos. I knew after brainstorming that it would be perfect for a personal story of mine focusing on pineapple upside down cake!
I created this layout as a Scraplift in the forum, and loved using up the frames stretched across my page to replicate the lift look. I started with a pretty flowered base seeds paper.  To mute the busy look, I stacked a fun pineapple vellum paper atop it.
Not having a photo for my story, I chose to fill my frames with my title, journaling, and fun embellishments.I backed my main title using a fun pineapple paper square found in the 4x4 frames. I created my title using a mix of an embellishment pack and some gold Heidi Swapp glitter alphas.
In creating this layout, hubby added his genius two cents, suggesting I turn my what had been, right side up pineapple, upside down, to better suit my theme. Who says men don't understand this hobby!!! Using my circle punch I cut circles out from the SOUR PAPER and smaller circles from the BRUNCH PAPER.
Finishing off with sprinkling my confetti about, I had completed my first photo free page!!
                                                                          Brianna